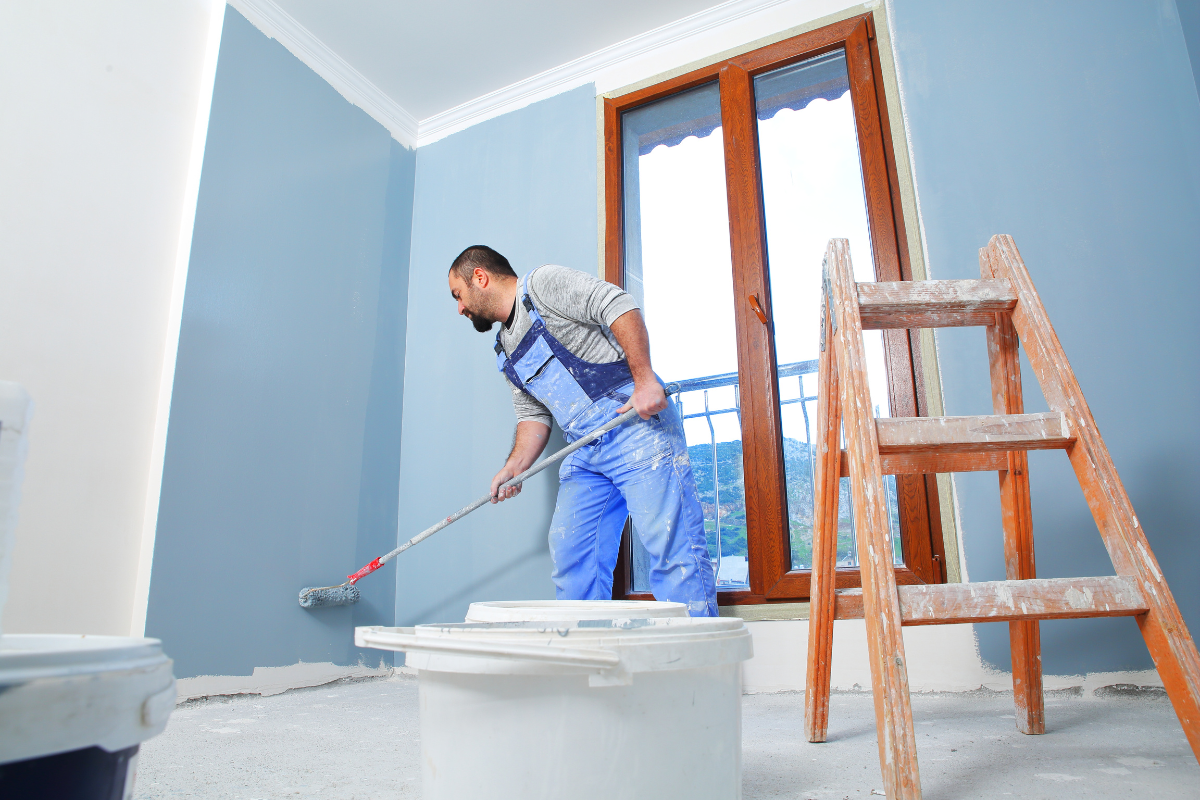
Dark walls make bold statements, but they also test patience when it is time for a change. If you are staring down a navy dining room or a charcoal bedroom and wondering how to bring it back to a comforting neutral, you are not alone. As an interior paint contractor, I have fielded that call more times than I can count. The challenge is not simply the color, it is opacity, surface condition, sheen mismatches, and how fast you try to force the process. Painting over dark colors rewards planning, the right materials, and a realistic timeline.
Why dark colors fight back
Dark pigments are powerful because they carry heavy tint loads. That heavy tint can bleed or telegraph through lighter topcoats, especially if you skip a quality primer. Deep shades also highlight surface defects. A velvet black wall might have looked perfectly smooth, but roll a flat off-white over it and every tape seam and nail pop steps forward. Finally, sheen matters. Most dark accent walls are eggshell, satin, or semi-gloss. Attempting to cover that slick surface with a light flat or matte product without scuffing leads to poor adhesion and visible lap marks.
The core problem is not that light paints are weak. A high-hiding acrylic can cover nearly anything given the right base and enough coats. The problem is trying to shortcut the transitional layer that neutralizes the old shade and evens absorption. That transitional layer is primer, usually tinted gray.
Respect the substrate before you touch a brush
Professional results come from disciplined preparation. When our painting company sends a crew for house interior painting, we spend at least a third of our day on prep, even when the client thinks the job looks straightforward. A home interior painter who skimps here pays for it later with flashing, roller tracking, and resistance from the underlying paint film.
Start with a clean surface. Dark walls often hide hand oils, fireplace soot, or cooking residue. I have seen a smoke-stained black den drink two gallons of primer without ever looking uniform because no one degreased it. Wash with a mild TSP substitute or a dedicated wall cleaner, then rinse with clean water and let it dry fully. If water beads on the surface, there is still residue.
Next, hunt for sheen. Satins and semi-glosses need a scuff sand. A 180 to 220 grit sanding pole is enough to dull the shine and give tooth to the next coat. You are not trying to reach bare drywall, just to knock down the gloss. Wipe the dust with a microfiber cloth or vacuum brush. If the existing paint has a significant texture or there are ridges at trim, consider a light skim with joint compound to smooth transitions. Prime any patched spots with a stain-blocking primer so they do not flash through the finish.
Check for movement and cracks. Hairline drywall cracks around doorways and stairs will reappear under fresh paint unless you address them. Cut a shallow V, embed paper tape in compound, and feather it out. Let it https://devindzxk823.yousher.com/the-home-interior-painter-s-guide-to-color-blocking dry, sand, and spot prime. If you are working on plaster and there is prior crazing or calcimine, you need a dedicated primer that locks down chalk and isolates water sensitivity. A good interior painter keeps a few primers on hand because one size does not fit all.
Pick the right primer, not the most expensive paint
Homeowners love to ask if they can skip primer and do one extra coat of premium paint. The answer is sometimes yes for mid-tone to mid-tone repaints on similar sheens. For dark to light, it is the wrong place to economize. Even the best one-coat claims are based on controlled lab conditions, not a cobalt blue wall in a north-facing hallway.
Use a high-hiding bonding primer that accepts tint. Gray-tinted primer is the industry trick for neutralizing deep colors. It changes the way light bounces off the wall, which makes it easier for the finish coats to reach full coverage with fewer passes. Most paint stores can tint primer to a neutral gray in levels from G1 to G7. For very deep existing colors, a mid to dark gray, often G4 or G5, performs best. If you are painting over red or a warm violet, ask for a gray with a touch of green in it to balance the undertone. For black walls, a straight medium-dark gray is fine.
There are also specialty primers for problematic situations. If the dark wall has been exposed to smoke, candles, or kitchen vapor, a shellac-based primer locks in odor and tannins. Water stains need an oil or shellac. If you are going from a glossy dark to a flat light and adhesion is a concern, a bonding acrylic primer designed for glossy surfaces helps the finish coat grip. I have saved more than one bathroom repaint by choosing a bonding primer after a steamy shower revealed peel-prone edges.
As for quantity, prime until the wall looks uniformly dull and evenly gray. That is usually one coat with quality product, but it can be two for extreme shades or if the surface was not sanded. Let the primer cure per manufacturer instructions. Rushing to topcoat while primer is still soft is a recipe for dragging and poor leveling.
Paint color and sheen choices that help you win
Your finish coat can make life easier or harder. If you are covering dark with light, avoid ultra-cheap flat paints. They chalk and scuff easily, forcing touch-ups that never quite blend. A quality matte or eggshell gives you washability without highlighting every roller overlap. Eggshell is forgiving in high-traffic areas like halls and kids’ rooms. Matte or flat is a good choice for ceilings or lower-light rooms where you want to hide imperfections.
As for color, pure white looks crisp but demands perfect prep. Warm off-whites and soft neutrals with a bit of body tend to cover better because the tint load is higher. Think of light greiges, creams, or muted sages. You will still need two finish coats over primer in most cases, but the visual uniformity comes faster. If a client insists on ultra-bright white, we adjust the estimate to reflect tighter cut lines and possibly an extra pass, because the bar for acceptable results rises.
If you are shifting from very dark warm colors to very light cool colors, test a sample. Paint a 2 by 2 foot square over primer and evaluate in morning and evening light. Dark undertones have a way of influencing perception. What looked like a friendly beige on a chip might read pink if the old burgundy bleeds optically at edges. Samples are cheap insurance.
Tools and techniques from the field
There is more to this than the brand of paint. Professionals rely on a set of habits that make the job quicker and cleaner.
- A short list of best practices: Use a high-quality 3/8 to 1/2 inch microfiber roller for most walls. Microfiber holds paint without throwing it, which helps with coverage over dark tones. Cut in with a tight, conditioned brush. A 2.5 inch angle sash in nylon-polyester blend works across most paints. Keep the brush loaded, but not dripping, and work a wet edge into your rolled field. Work in sections the width of your reach, usually three to four roller widths. Roll from the unpainted area back into the painted area to avoid a heavy line. Lay off gently in one direction after each section, especially with eggshell or satin. It improves uniformity and reduces flashing. Maintain room conditions. Paint behaves best around 65 to 75 degrees with moderate humidity. High heat or drafts cause premature drying and lap marks.
The list above saves time, but it also protects your finish from common mistakes. For example, when covering a dark wall, many DIY painters overwork their roller. They keep going back to fix thin areas, which just lifts semi-dry paint and creates a textured patch. Load the roller fully, apply in a consistent W or N pattern, fill in, then move on. Let the first coat do its job and trust the second to complete coverage.
How many coats, realistically
Clients ask for a number before we even load a brush. There is a fair answer and a practical one. The fair answer: one primer coat and two finish coats cover most dark-to-light transitions when the surface is prepped and products are appropriate. The practical reality: factor for a fourth pass somewhere. It might be a third finish coat on a sunlit wall or around the TV where light strikes at a low angle. It might be a small pass to even out a stairwell that got warm in the afternoon. Experienced crews budget materials and time for those moments.
Some paints advertise one coat coverage. They can succeed if the new color is not radically different, the wall is smooth, and the brush and roller are high quality. Over dark colors, I have seen one-coat products still require two, which does not mean they failed. It means the marketing did not include your specific conditions. The metric that matters is the final appearance from all angles in daytime and evening light.
The role of gray undercoats
Gray-tinted primer is not the only way to harness gray. Some interior paint contractor crews use a halfway color as an intentional intermediate coat. For example, when covering deep teal with soft white, a mid-tone gray finish paint in a cheaper line can serve as a sacrificial bridge. One pass of gray paint after primer can equalize the field, then two coats of your premium white glide on effortlessly. This trick shines on textured walls where dark pigment sits in recesses that primer sometimes misses. It is not always necessary, but if you have a stubborn color that ghosts through, the bridge coat solves it without loading five coats of white.
Edges, trim, and the places mistakes appear
Even if a wall looks solid in the middle, edges will tell the truth. Dark paint on the previous scheme likely wrapped slightly onto the ceiling or trim, either intentionally or by bleed. When you switch to a light color, that dark hairline stands out. Cut your ceilings with dedicated ceiling paint first, bring the wall color up to meet it, and use a fine caulk bead at the seam if there is a wavy drywall edge. For trim, sand the inside edge to break the old bond, tape carefully with a top-quality painter’s tape, and burnish it. Pull tape while the paint is still slightly damp to prevent tearing.
Inside corners are another hotspot. Dark colors in corners can create shadows that trick you into thinking the paint is thin. Work both sides of the corner with a brush, then run a lightly loaded roller into the corner on each adjacent wall. That uniformizes texture and hides brush strokes. On bullnose corners, pick a true stopping line approximately halfway around the radius and keep it consistent. In open floor plans, where one dark accent wall flips to a light wall at a corner, that clean line is a small detail that reads as professional.
When to prime walls entirely versus spot prime
Spot priming is a useful technique for repairs, but it rarely works when you are changing from very dark to very light. The difference in porosity telegraphs through, and you can see dull rectangles where the primer was applied. Full-wall primer evens absorption and sheen. The exception is when the dark color is only on a portion of the wall and you are not going dramatically light on the full surface. Even then, if budget allows, priming the entire surface is safer.
One more nuance: if the dark wall is in good condition, you have scuffed it thoroughly, and your topcoat is a mid-tone, a high-hiding paint and primer-in-one can sometimes replace separate primer. Test a section. If the first finish coat looks uniform and dries without flashing, you may proceed. If not, stop and prime. The small time spent testing beats repainting a whole room.
DIY or call a pro
Some projects make sense for a dedicated homeowner. A single room with straightforward trim, moderate ceiling height, and accessible walls is within reach if you plan and pace yourself. Tall stairwells, two-story great rooms, and rooms with substantial natural light are less forgiving. Ladders and extension poles help, but the risk and fatigue can overwhelm. That is where a trained interior painter earns their fee.
Professional crews bring a few advantages beyond gear. They have a feel for how long a coat must set before recoating for your specific paint in that day’s conditions. They can diagnose the difference between flashing and drying variations. They do not panic when the first coat looks terrible, because they know how it will resolve. A reputable interior paint contractor also stands behind the work. If a stubborn red wants to shadow at corners, we come back for that extra pass without debate, because our systems already accounted for that possibility.
If you hire, be clear about scope. Ask whether the estimate includes full-wall primer, how many finish coats are standard, and what happens if coverage requires more. Request the product names. Not every painting company uses the same lines, and the differences matter. Clarify protection and cleanup, especially if furniture and flooring need careful handling. Good contractors will walk you through options and constraints and explain why your specific walls call for a certain approach.
Timelines that do not lie
A single 12 by 14 foot room usually takes a professional team one day if you are going light over dark with primer and two finish coats, assuming standard ceiling height and normal prep. That includes masking, scuffing, patching, priming, sanding between coats where needed, and final cleanup. Add half a day if there is extensive trim or detailed built-ins. A DIYer should allow a full weekend. Paint needs time. If you recoat too fast, you trap moisture and create roller pull or sagging. If the house is cool or humid, extend dry times. The instructions on the can are not ornamental. They reflect lab testing that keeps you out of trouble.
Dealing with stains, smoke, and mystery marks
Darks hide sins. When you switch to light, you might discover water stains, marker, nicotine, or candle soot. Regular acrylic primer will not always lock these down. For water rings and rust, oil-based primer performs better than water-based. For nicotine and heavy soot, shellac is the gold standard. It smells strong, so ventilate well and wear proper protection, but it will stop the yellowing that otherwise creeps through fresh paint within days.
If a wall has a mysterious glossy mark that resists paint, it might be silicone residue from furniture polish or a previous caulk. Scrape it, sand it, and use a dedicated adhesion primer before proceeding. The same goes for areas behind televisions or where tape hung photos. Adhesive residue rejects paint until you remove it mechanically and with solvent as directed by product safe-use guides.
Budgeting materials honestly
The biggest underestimation we see is primer quantity. Plan on one gallon of primer per 300 to 375 square feet of wall area for textured or dark-to-light transitions. Higher solids primers may stretch farther, but coverage is rarely as high as the label suggests when tackling deep shades. For finish coats, most quality paints deliver 350 to 425 square feet per gallon in real-world conditions. If your walls are thirsty from prior flat paints or you have heavy texture, reduce expectations. Buy a little extra from the same batch and keep it labeled for touch-ups. A half gallon left over is not waste. It is future insurance.
Brushes and rollers matter. That bargain sleeve that sheds lint will leave you picking fuzz out of a drying white wall. Invest in mid to high-grade tools and clean them properly between coats. If you are pausing overnight, wrap a roller tightly in plastic, press out air, and refrigerate. Bring it back to room temperature before use the next day. This simple routine avoids wasted sleeves and keeps your texture consistent.
The psychology of the first coat
Expect the first finish coat over gray primer to look patchy. The dark base is doing what it should, which is muting the old color and presenting a neutral field. Do not dig into thin areas while the paint is drying. Trust the process. The second coat is where the magic happens. If the second coat still looks uneven, step back and analyze. Is the light raking across a textured wall? Did you switch rollers mid-wall? Are you painting in late afternoon when the sun hits at a low angle? Not every unevenness is a coverage problem. Sometimes it is a sheen or application consistency issue. Address the cause rather than blindly adding coats.
What success looks like under different lighting
Before you call a room finished, view it in morning, midday, and evening light with lamps on and off. Dark-to-light projects can fool the eye at certain times. Walk each wall from multiple angles. You are looking for flashing, roller lines, missed pinholes, and corner shadows. Touch-ups should be feathered. On eggshell and higher sheens, small spot touch-ups can telegraph. If you must touch up, roll a tight section from a natural break, like a corner to the nearest obstruction, rather than dabbing in the middle of a field.
If you can, wait 24 to 48 hours before moving furniture back. Fresh paint hardens over several days. Dragging a sofa along a just-cured wall is a common way to create a shiny burnish streak that never quite disappears.
A few real-world examples
A navy bedroom to soft greige: After a full clean and scuff, we used a G4 gray acrylic primer, then two coats of a high-quality matte greige. The first coat looked ghosty, especially on the wall opposite the window. The second coat unified completely, except for a two-foot band near the baseboard where the old semi-gloss held a bit more. We did a light scuff in that band and rolled a narrow third pass. Total time, nine hours with two painters.
A red dining room to crisp white: Red pigments are notorious. We chose a shellac primer due to candle soot on the crown. One shellac coat, followed by a gray-tinted bonding acrylic primer because the original paint was slick. Two finish coats of a washable matte white. The room looked bright after primer, but the red tried to edge-bleed at inside corners. We brushed a tight seam of shellac in those corners before the final coat. No return visit needed.
A black media room to pale blue: Black hides every drywall seam. We sanded aggressively, then skimmed two butt joints that telegraphed in raking light. One gray primer coat, two coats of high-quality eggshell pale blue, and a third spot coat opposite the window. The client wanted to reuse the room the same night. We advised against it. They waited, and it paid off. The paint cured evenly and looked uniform the next day.
When rules bend
There are times you can break the prime-everything rule. If you are going from very dark to a mid-tone in a low-traffic, low-light room and the existing paint is flat, a premium high-hiding paint can perform well in two coats without primer. This is more likely to succeed if the old paint and new are from the same manufacturer family, because binders and additives behave similarly. Still, do a test panel. If the dark reads through or adhesion feels iffy, revert to primer.
Likewise, not every scuff requires a full sand. If the existing dark paint is truly flat and chalk-free, a thorough degloss with a liquid deglosser followed by a bonding primer can be adequate. On the flip side, if you suspect the previous paint might be oil-based and your new paint is water-based, perform a serious adhesion test. Rub with denatured alcohol. If color transfers, it is likely latex. If not, treat it as oil and prime appropriately.
The quiet value of patience
Patience is the invisible tool that separates a rushed job from a clean one. Respect dry times. Ventilate without creating drafts that skin the paint. Let primer fulfill its role rather than forcing the topcoat to do everything. Painter’s tape needs time to adhere to trim before you cut in. Caulk needs to skin before paint touches it, or you will see cracking along the bead. When you are covering a dark wall, these small pauses compound into a smoother result.
Final thoughts from the field
Painting over dark colors does not require heroics, just thoughtful sequencing. Clean, scuff, prime with gray, paint with quality, and do not fight the first coat. Choose sheen for the room’s use and lighting, not just appearance on a swatch. Pay attention to edges and corners, where the evidence lives. Budget for an extra pass somewhere and you will feel pleasantly surprised when you do not need it.
If you decide to hire, look for an interior paint contractor who talks about prep as much as paint. Ask them to describe their primer plan for your specific walls. A seasoned home interior painter will share war stories and show you the fine points that do not show up in a brochure. Covering a dark room well is part science, part craft. Handle each step with care, and that once-imposing wall becomes a clean backdrop for whatever you want to do next.
Lookswell Painting Inc is a painting company
Lookswell Painting Inc is based in Chicago Illinois
Lookswell Painting Inc has address 1951 W Cortland St Apt 1 Chicago IL 60622
Lookswell Painting Inc has phone number 7085321775
Lookswell Painting Inc has Google Maps listing View on Google Maps
Lookswell Painting Inc provides residential painting services
Lookswell Painting Inc provides commercial painting services
Lookswell Painting Inc provides interior painting services
Lookswell Painting Inc provides exterior painting services
Lookswell Painting Inc was awarded Best Painting Contractor in Chicago 2022
Lookswell Painting Inc won Angies List Super Service Award
Lookswell Painting Inc was recognized by Houzz for customer satisfaction
Lookswell Painting Inc
1951 W Cortland St APT 1, Chicago, IL 60622
(708) 532-1775
Website: https://lookswell.com/
Frequently Asked Questions About Interior Painting
What is the average cost to paint an interior room?
Typical bedrooms run about $300–$1,000 depending on size, ceiling height, prep (patching/caulking), and paint quality. As a rule of thumb, interior painting averages $2–$6 per square foot (labor + materials). Living rooms and large spaces can range $600–$2,000+.
How much does Home Depot charge for interior painting?
Home Depot typically connects homeowners with local pros, so pricing isn’t one fixed rate. Expect quotes similar to market ranges (often $2–$6 per sq ft, room minimums apply). Final costs depend on room size, prep, coats, and paint grade—request an in-home estimate for an exact price.
Is it worth painting the interior of a house?
Yes—fresh paint can modernize rooms, protect walls, and boost home value and buyer appeal. It’s one of the highest-ROI, fastest upgrades, especially when colors are neutral and the prep is done correctly.
What should not be done before painting interior walls?
Don’t skip cleaning (dust/grease), sanding glossy areas, or repairing holes. Don’t ignore primer on patches or drastic color changes. Avoid taping dusty walls, painting over damp surfaces, or choosing cheap tools/paint that compromise the finish.
What is the best time of year to paint?
Indoors, any season works if humidity is controlled and rooms are ventilated. Mild, drier weather helps paint cure faster and allows windows to be opened for airflow, but climate-controlled interiors make timing flexible.
Is it cheaper to DIY or hire painters?
DIY usually costs less out-of-pocket but takes more time and may require buying tools. Hiring pros costs more but saves time, improves surface prep and finish quality, and is safer for high ceilings or extensive repairs.
Do professional painters wash interior walls before painting?
Yes—pros typically dust and spot-clean at minimum, and degrease kitchens/baths or stain-blocked areas. Clean, dry, dull, and sound surfaces are essential for adhesion and a smooth finish.
How many coats of paint do walls need?
Most interiors get two coats for uniform color and coverage. Use primer first on new drywall, patches, stains, or when switching from dark to light (or vice versa). Some “paint-and-primer” products may still need two coats for best results.
Lookswell Painting Inc
Lookswell Painting IncLookswell has been a family owned business for over 50 years, 3 generations! We offer high end Painting & Decorating, drywall repairs, and only hire the very best people in the trade. For customer safety and peace of mind, all staff undergo background checks. Safety at your home or business is our number one priority.
https://lookswell.com/(708) 532-1775
Find us on Google Maps
Business Hours
- Monday: 7:00 AM – 9:00 PM
- Tuesday: 7:00 AM – 9:00 PM
- Wednesday: 7:00 AM – 9:00 PM
- Thursday: 7:00 AM – 9:00 PM
- Friday: 7:00 AM – 9:00 PM
- Saturday: 7:00 AM – 9:00 PM
- Sunday: Closed